Showing posts with label XP. Show all posts

Command

01. Matrix Command 


Command Prompt Matrix NUMBERS
i
My last Instructable with the Matrix was only with the letters, but this one is a batch file that uses numbers, and looks more realistic. The real Matrix used Japanese letters and other symbols, but this one just uses numbers in different orders and sizes and it looks more realistic from my last Instruct-able.

It is pretty easy so lets get to it.

Step 1What Technology do I need?


What Technology do I need?
i
You need:

  • PC with command prompt
  • The notepad application
  • The code I will give you

Step 2The Code


The Code
i
Ok, to enter the code, you have to open the Notepad.

Enter this code:

@echo off
color 0a
:top
echo %random% %random% %random% %random% %random% %random% %random% %random% %random% %random% %random% %random% %random% %random%
goto top

  • Make sure the %random% is in one line across the screen, don't let it go to another line.

Step 3Save it as .bat


Save it as .bat
i
Save the notepad file on to your Dekstop as a .bat file.

Save it as:

matrix.bat

You have to have the .bat at the end for this to work, because .bat is batch and batch is used with the command prompt.

Step 4Open it and let it run


Open it and let it run
i
  • icon matirx.bmp
  • matrix instructable.bmp
Open it on your desktop and let it run!!!

Show it to your friends and watch them be amazed.

Step 5Making Screen Bigger


Making Screen Bigger

  • ddefaults.bmp
  • ddefualts 2.bmp
If you want to make it full screen, right click on the top blue bar, and click properties.

Choose layout, and change the height and width of the window size to 300. If you want to make the 300 default, right click on the top bar again, choose defaults, choose layout again, and make the height and width 300.

Keep in mind:

  • If you make the screen bigger, you will have to add more: %random% to the code.
So, just copy the code over and over again about 20 times.

Have Fun!

02. Super Hide the files Using Command Prompt
All of us want to hide some files, movies and the stuff we want from others. Many of us make the attributes of the file as hidden and make it invisible through the folder options. But every computer user knows it. I know on using other’s computer almost all of us enable showing hidden files to see what secret content he has, Don’t you ? But there exists a trick with which you can hide your content from others.  Let me give you that……….

Well, If you are a command line lover, then I do not need to tell you about this. If you are not, you are welcome here. There is a command called attrib in the Command Prompt in Windows. Operation of this command is to show the attributes of the file  like read only, system file ,hidden and many more. With this command you can set and change the attributes of the complete folder and the file too.
You need to traverse to the directory where your content is saved, say it is the folder A.
Then,
I will type “attrib A +s +h +a” to make it super hidden.
For, accessing A there are two methods,
1st- reset the attributes of the file/folder by the command  ”attrib A -a -s -h”
2nd – Traverse to the directory where the your file /folder is located, in the explorer address click, if you are using Windows 7 you will see that the address has changed to older WIndows style path, here you only need to extend the address by \A where A is the name of the folder. If it is a file, enter its name with its extension.
I prefer using second as after 1st time, your manually entered address gets into the history and you can use it when you want. You can also create the batch file to automate the 1st step.
Now, comes the explanation, by apping these attributes, you actully change the file/folder into a system folder having special securoty apart form the hidden files.
Remmeber, If someone enables viewing system files, you will be caught….
But, not everyone likes to see the system files to temper with it, specially in Windows.
So, Try IT.

03.Change the color of the Command Prompt
If by mistake you took my last post seriously about learning the commands of the command prompt, then you really do not need to read this stuff. I was searching something in google, I visited a blog where the author had written about “MATRIX COMMAND PROMPT”, it was a catchy headline, I visited the article, the author told about the green window of the matrix movie and he provided a bat file where he changed the font color and generated some random number. It was really a miss. Okay I am here to tell you how to give a new life to your cmd if you love working with it.

There is a command called color incommand prompt used to change the color of the fonts in Command Prompt. From help menu of the color command you can get the color codes.
For example if you write
color 1
it will change the white font color to blue.
After trying all the color codes you can get the one you like. But this is not enough, you can change the background color too.
For this, you need to right click the title bar of the Command Prompt. From here you need to select its properties.
From the properties windows that will be opened, U need to select the colors tab.
Here, u will see the Screen Background, Select the desired background color.
Congratulations, you have given your Cmd a new look.

04.Chat With Command Prompt

If you want personal chat with a friend
you don't need to download any yahoo messenger
All you need is your friends IP address and Command Prompt.
Firstly, open Notepad and enter:
@echo off
:A
Cls
echo MESSENGER
set /p n=User:
set /p m=Message:
net send %n% %m%
Pause
Goto A
Now save this as "Messenger.bat". Open the .bat file and in Command
Prompt you should see:
MESSENGER
User:
After "User" type the IP address of the computer you want to contact.
After this, you should see this:
Message:
Now type in the message you wish to send.Before you press "Enter" it should look like this:
MESSENGER
User:27.196.391.193
Message: Hi
Now all you need to do is press "Enter", and start chatting!


05.Hidden Programs In Windows XP !

Is it strange to hear , but true that some good programs are hidden in Windows XP !!!

Programs :

1. Private Character Editor :

Used for editing fonts,etc.
** start>>Run
** Now, type eudcedit

2. Dr. Watson :

This an inbuilt windows repairing software !
** start>>Run
** Now, type drwtsn32

3. Media Player 5.1 :

Even if you upgrade your Media Player, you can still access your old player in case the new one fails !!!
** start>>Run
** Now, type mplay32

4. iExpress :

Used to create SetupsYou can create your own installers !
** start>>Run
** Now, type iexpress

06.Install Xp From Dos 
If XP will not install from the CD or if you have a new drive with no operating system on
it yet try these:

Install Windows XP from the hard drive with Windows 98 already installed:

Boot Windows 98
Insert the XP CD into your CD reader
Explore Windows XP through My Computer
Copy i386 folder to C:\
Go into C:\i386 folder and double click on winnt32.exe to launch the setup from the hard drive

Install Windows XP from DOS (ie. no OS on a new hard drive):

Boot with a Windows 98 Start Up disk
Insert the Windows 98 CD into the CD reader
Run smartdrv.exe from the Win98 directory on the windows 98 CD (file caching)
Type cd.. to back up to the root directory
Insert Windows XP CD into the CD reader
Copy the i386 folder to C:\
Go into C:\i386 folder on C: and type winnt.exe to launch the setup from the hard drive.

 07.Hide Files or Folders Using Command Prompt

User Submitted. Thanks S.V.Vignesh Raaj (View Thread) Trick to hide files and folders using Command Prompt
The most important thing is that, once hidden with this method, the files/folders cannot be viewed by any search options even if you click "Show All Hidden Files and Folders".

Hiding the most wanted files and folders is very important nowadays and it's really a tedious job too. In order to make this tedious job an easy one, i'm going to deliver you a the trick now.

For Example: You have a folder named "collegephotos" and this folder is stored in (Disk Drive E). You think that it should not be seen by strangers who use your PC.

For that you need to follow the following instructions


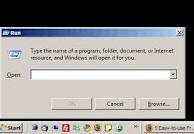
  1. Press windowkey+R: Run command dialog box appears.
  2. Now type "cmd" and hit enter. A command prompt window displays.
  3. Now type "attrib +s +h E:\collegephotos" and hit enter.
  4. The folder "collegephotos" will be hidden (Note: It cannot be viewed by any search options)

    (To view this folder again, use the same command but replace '+' with '-' on both flags 's' and 'h')

 08.Command Prompt on Right-Click
Many computer users, specially the programmers, need to launch a command prompt window every once in a while to execute some dos/shell commands. The problem is, when a command prompt window launched, the default path is normally the system path or the user profile's path. The users will then have to do all the "cd" commands to change the directories to the path he/she wants.
This trick shows you how to add an option called "Command Prompt" when you right-click on a folder in Windows. With this option, a Command Prompt Window will launch and its current directory will be the path to the folder you've selected.
Use this trick at your own risk.
Here's what you'll get:


The Solution
You can either edit your registry OR download the registry file and apply it on your computer.
Method I. Manually edit the registry:
  1. Start > Run
  2. Enter "regedit" and hit Enter
  3. Expand to "HKEY_LOCAL_MACHINE\SOFTWARE\Classes\Folder\shell"
  4. Right-click on "shell" and select New > Key
  5. Make sure a new key is created under "shell". Change the name of this key to "Command Prompt"
  6. Right-click on this new key "Command Prompt" and select New > Key
  7. Change the name of this key to "command"

  8. Here's what we should have:

  9. Double-click on the "(Default)" text on the right window to bring up the edit box
  10. Enter this text into the Value Data field:
    cmd.exe "%1"
  11. Click OK and close the registry.
Method II. Download and apply the registry file:
  1. Download this registry file Here
  2. Unzip it to a temp folder, then double-click on the .reg file to add the registry data.
 09.Create a bootable CD or DVD with or without floppy
 With the CD-ROM available on almost every computer nowaday, floppy drives become a history. However, for those who find computers a hobby, might run into a situation when they need to create a bootable CD that works just like the old floppy disk. Unfortunately, to do this, you still need a floppy drive to read your bootup floppy disk. Wait, the good news is, you can just down load a bootable ISO image and burn it to a CD. And even better, we have a copy of an ISO image right here. You can download this image and follow the instructions below, or you can do a web search for more options.
The information on this article will guide you step-by-step how to create a bootable CD/DVD, either using a bootup floppy disk or a boot image file. You will end up having a bootable CD or DVD, with CD-ROM driver supported, that could startup your PC and bring up the command prompt. This is going to be a good starting point, then you can run other utilities such as hard drive ghost, etc..
Many current CD/DVD burning software support the bootable feature. If you already have your favorite burning software, look around to find the bootable option. For this article, I will use the steps and sample screen-shots with the burning tool called Nero.
You will need a boot disk (floppy) or a bootable ISO image to start. If you don't have one, you can download an ISO image here. This boot image is Windows-98 based, which means it uses the Windows 98 bootup sequence, which should do what we need. You can also download different boot disk images from the internet. I've found bootdisk.com has a very good collection.
I assume that you already have Nero installed. Also, it is highly recommended to use a rewritable disc so you can redo the process if you have to.

  1. Launch Nero Burning ROM
  2. At the New Compilation Window, select "CD" from the drop-down menu and select "CD-ROM (Boot)" for CD, (or select "DVD" and "DVD-ROM (Boot)" for DVD)


  3. If you use a bootup floppy disk, insert the floppy disk and select "Bootable logical drive..."


  4. If you use an image file, select "Image File" then click "Browse" to browse to the image.

    At the "Open" Window, browse to the location where you saved the boot image and choose the image you wish to use and click "Open" (you might need to change the "Files of type" to "All Files" in order to see files with different extensions.)


  5. Click "New" at the New Compilation Window.
  6. Nero New Compilation Window disappears and Nero brings up its main screen where you can add more files to the CD/DVD if you wish. For example, adding a "ghost" folder with the file "ghost.exe" as follows.
    Once you're done adding all the files you wish to, click on the "Burn" icon.


  7. At the "Burn Compilation" Window, select "Burn"!


Related Articles:
Create a boot image from a floppy boot disk
10.   BASIC COMMAND

Friends ,here is some useful shortcuts run commands for you .
SHIFT+DELETE ( Delete the selected item permanently without placing the item in the Recycle Bin )
CTRL+C ( Copy )
CTRL+X ( Cut )
CTRL+V ( Paste )
CTRL+Z ( Undo )
CTRL while dragging an item ( Copy the selected item )

CTRL+SHIFT while dragging an item ( Create a shortcut to the selected item )

F2 key ( Rename the selected item )

CTRL+RIGHT ARROW ( Move the insertion point to the beginning of the next
word )

CTRL+LEFT ARROW ( Move the insertion point to the beginning of the previous word )

CTRL+DOWN ARROW ( Move the insertion point to the beginning of the next paragraph )

CTRL+UP ARROW ( Move the insertion point to the beginning of the previous paragraph )

CTRL+SHIFT with any of the arrow keys ( Highlight a block of text )
ALT+Underlined letter in a menu name ( Display the corresponding menu )
Underlined letter in a command name on an open menu ( Perform the corresponding command )

F10 key ( Activate the menu bar in the active program )

RIGHT ARROW ( Open the next menu to the right , or open a submenu )

LEFT ARROW ( Open the next menu to the left , or close a submenu )

F5 key ( Update the active window )

BACKSPACE ( View the folder one level up in My Computer or Windows Explorer )

ESC ( Cancel the current task )

SHIFT when you insert a CD-ROM into the CD-ROM drive ( Prevent the CD-ROM from automatically playing )
CTRL+A ( Select all )

F3 key ( Search for a file or a folder )

ALT+ENTER ( View the properties for the selected item )

ALT+F4 ( Close the active item , or quit the active program )

ALT+ENTER ( Display the properties of the selected object )

ALT+SPACEBAR ( Open the shortcut menu for the active window )

CTRL+F4 ( Close the active document in programs that enable you to have
multiple documents open simultaneously )

ALT+TAB ( Switch between the open items )

ALT+ESC ( Cycle through items in the order that they had been opened )

F6 key ( Cycle through the screen elements in a window or on the desktop )

F4 key ( Display the Address bar list in My Computer or Windows Explorer )

SHIFT+F10 ( Display the shortcut menu for the selected item )

ALT+SPACEBAR ( Display the System menu for the active window )

CTRL+ESC ( Display the Start menu )
CTRL+TAB ( Move forward through the tabs )

CTRL+SHIFT+TAB ( Move backward through the tabs )

TAB ( Move forward through the options )

SHIFT+TAB ( Move backward through the options )

ALT+Underlined letter ( Perform the corresponding command or select the
corresponding option )

ENTER ( Perform the command for the active option or button )

SPACEBAR ( Select or clear the check box if the active option is a check box )

Arrow keys ( Select a button if the active option is a group of option buttons )

F1 key ( Display Help )

F4 key ( Display the items in the active list )

BACKSPACE ( Open a folder one level up if a folder is selected in the Save As
or Open dialog box )

Windows Logo+F ( Search for a file or a folder )

CTRL+Windows Logo+F ( Search for

A true computer genius knows all about commands of Command Prompt. You can guess its importance by the fact that though a better Graphical User Interface is being provided by the Microsoft in Windows but still Windows have Command Prompt in it. It enables you a lot of tricks by creating batch files, some hacking also. I am not going to tell you how you can use Command Prompt for hacking but I am here to tell you how to have a good command at Command Prompt. I will tell U way how U can get the complete information about a command in Cmd.

Command Prompt needs a lot of your memory so that you can easily remember many commands of the Command Prompt. It has a lot of Commands that need to be used and practiced by you. Now, first thing that you must know for having a good command over command prompt is of course is the list of commands that Command Prompt provides.
You can get it by typing only help in the command prompt.It will give the list of commands.
Secondly, you need to select a command that you want to know. For example, I want to know about net command. It is a great command whose utility I will tell you some other day. So, I want to know about net command, I will write “help net” in the command Window. Sometimes the help section of the particular command is quite large. Then, it becomes quite painful to see all the details of a particular command. For this, there is also a way, you need to write
help command-name |more
After all if you feel lazy to type then I have something for you.
You need to write “commad-name /?”
That’s all my friend.
And of course, do not forget about Internet, the Ultimate Knowledge Source, you will get more from here than the command Window.
Keep Learning…………………………


Tips And Tricks, Windows XP - Part3


Forgetting What Your Files Are?
===============================

This procedure works under NTFS.

As times goes along you have a lot files on your computer. You are going to forget what they are. Well here is way to identify them as you scroll through Windows Explorer in the future.

This procedure works under NTFS.

1.. Open up a folder on your system that you want to keep track of the different files you might one to identify in the future.

2.. Under View make certain that you set it to the Details.

3.. Highlight the file you want to keep more information on. Right click the file and you will get a pop up menu. Click on properties.

4.. Click on the Summary Tab (make sure it says simple not advanced on the button in the box), You should now get the following fields,

Title,Subject, Author, Category, Keywords, Comments

You will see advanced also if you have changed it to simple, Here will be other fields you can fill in.

5.. Next you can fill in what ever field you want.

6.. After you finished click the apply button then OK.

7.. Next right click the bar above your files, under the address barand you should get a drop down menu. Here you can click the fields you want to display.

8.. You should now see a list with the new fields and any comments you have done.

9.. Now if you want to sort these just right click a blank spot and then you sort the information to your liking.


Change Web Page Font Size on the Fly
====================================

If your mouse contains a wheel for scrolling, you can change font size on the fly when viewing a Web page. To do so:

Press and hold Ctrl. Scroll down (or towards yourself) to enlarge the font size. Scroll up (or away from yourself) to reduce the font size.

You might find it useful to reduce font size when printing a Web page, so that you can fit more content on the page.


Remove the Shared Documents folders from My Computer
====================================================

One of the most annoying things about the new Windows XP user interface is that Microsoft saw fit to provide links to all of the Shared Documents folders on your system, right at the top of the My Computer window. I can't imagine why this would be the default, even in a shared PC environment at home, but what's even more annoying is that you cannot change this behavior through the sh*ll
: Those icons are stuck there and you have to live with it.
Until now, that is.

Simply fire up the Registry Editor and navigate to the following key:
HKEY_LOCAL_MACHINE \ SOFTWARE \ Microsoft \ Windows \ CurrentVersion \ Explorer \ My Computer \ NameSpace \ DelegateFolders

You'll see a sub-key named {59031a47-3f72-44a7-89c5-5595fe6b30ee}. If you delete this, all of the Shared Documents folders (which are normally under the group called "Other Files Stored on This Computer" will be gone.

You do not need to reboot your system to see the change.


Before: A cluttered mess with icons no one will ever use (especially that orphaned one). After: Simplicity itself, and the way it should be by default.


Some Registry Hacks:

@Auto Sort Start Menu:
HKEY_CURRENT_USER\Software\Microsoft\Windows\CurrentVersion\Explorer\MenuOrder
Go to Edit/Permissions, click Advanced, clear the "Inherit From Parent" check box, click Copy from the dialog box, click OK and then clear the "Full Control" for your account and now Windows will autp sort the start menu, but you can still do it too

@Disable User Tracking:
HKEY_CURRENT_USER\Software\Microsoft\Windows\CurrentVersion\Policies\Explorer
Add or Edit DWORD = NoInstrumentation, Value = 1
Disables Windows user tracking; better performance, much better privacy

@Cache Thumbnails:
HKEY_CURRENT_USER\Software\Microsoft\Windows\CurrentVersion\Explorer\Advanced
Add or Edit DWORD = DisableThumbnailCache, Value = 1
Disables thumbnails in Windows, saving hard drive space

@Kill Chrashed Apps Quicker:
HKEY_CURRENT_USER\Control Panel\Desktop
Add or Edit Sring = HungAppTimeout, Value = 1000-5000
Cuts time for Windows to recongize a crashed application and allow you to kill it; default is 5000(for 5 seconds)

@Faster Start Menu:
HKEY_CURRENT_USER\Control Panel\Desktop
Add or Edit Sring = MenuShowDelay, Value = 0 - 400
Changes the delay that for Windows to show a menu in the start menu; value is in ms

@Network Intelligently:
HKEY_LOCAL_MACHINE\SYSTEM\CurrentControlSet\Services\Tcpip\Parameters
Add or Edit String = DisableTaskOffload, Value = 1
Frees processor from doing network-card work

@Browse the Network Faster:
HKEY_LOCAL_MACHINE\SOFTWARE\Microsoft\Windows\CurrentVersion\Explorer\RemoteComputer\NameSpace
Delete subkeys {2227A280-3AEA-1069-A2DE-08002B30309D} and {D6277990-4C6A-11CF-8D87-00AA0060F5BF}
Speeds up network browsing of old Windows machines on the LAN by ignoring their scheduled tasks and printers


@Remove Compression Option In Disk Cleanup:
HKEY_LOCAL_MACHINE\SOFTWARE\Microsoft\Windows\CurrentVersion\Explorer\VolumeCaches\Compress old files
Delete the Default Value Key and the next time you start Disk Cleanup, it will skip the compression analyisis

Tips And Tricks, Windows XP - Part 2


@SPEED UP BROWSING WITH DNS CATCH:

When you connect to a web site your computer sends information back and forth, this is obvious. Some of this information deals with resolving the site name to an IP address, the stuff that tcp/ip really deals with, not words. This is DNS information and is used so that you will not need to ask

for the site location each and every time you visit the site. Although WinXP and win2000 has a pretty efficient DNS cache, you can increase its

overall performance by increasing its size. You can do this with the registry entries below:
*****************************************
Windows Registry Editor Version 5.00
[HKEY_LOCAL_MACHINE\SYSTEM\CurrentControlSet\Services\
Dnscache\Parameters]
"CacheHashTableBucketSize"=dword:00000001
"CacheHashTableSize"=dword:00000180
"MaxCacheEntryTtlLimit"=dword:0000fa00
"MaxSOACacheEntryTtlLimit"=dword:0000012d
*****************************************
1. Make a new text file and rename it to dnscache.reg.
2. Then copy and paste the above into it and save it.
3. Then merge it into the registry by double clicking on dnscache.reg


@SPEED UP DETAILED VIEW IN WINDOWS EXPLORER:

If you like to view your files in Windows Explorer using the "Details" view here is a tweak to speed up the listing of file attributes: Viewing files in

Windows Explorer using the "Details" mode shows various attributes associated with each file shown. Some of these must be retrieved from the individual files when you click on the directory for viewing. For a directory with numerous and relatively large files (such as a folder in which one stores media, eg: *.mp3's, *.avi's etc.)

Windows Explorer lags as it reads through each one. Here's how to disable viewing of unwanted attributes and speed up file browsing:
1. Open Windows Explorer
2. Navigate to the folder which you wish to optimize.
3. In "Details" mode right click the bar at the top which displays the names of the attribute columns.
4. Uncheck any that are unwanted/unneeded.
Explorer will apply your preferences immediately, and longs lists of unnecessary attributes will not be displayed.

Likewise, one may choose to display any information which is regarded as needed, getting more out of Explorer.


@DELETING My eBooks AND SPECIALS FOLDER IN MY DOCUMENTS:

1. Click Start
2.Go to Run and type: regsvr32 /u mydocs.dll
3. Now delete them.


@ADMINISTRATOR IN WELCOME SCREEN:
When you install Windows XP an Administrator Account is created (you are asked to supply an administrator password), but the "Welcome Screen" does not give you the option to log on as Administrator unless you boot up in Safe Mode.

First you must ensure that the Administrator Account is enabled:
1. open Control Panel
2. open Administrative Tools
3. open Local Security Policy
4. expand Local Policies
5. click on Security Options
6. ensure that Accounts: Administrator account status is enabled.

Then follow the instructions below
1. open Control Panel
2. open User Accounts
3. click Change the way users log on or log off
4. untick Use the Welcome Screen
5. click Apply Options

You will now be able to log on to Windows XP as Administrator in Normal Mode.


@OUTLOOK EXPRESS WINDOWS TITLE TWEAKS:
Change the window title of Outlook Express to anything you want!
In regedt32 and navigate to HKEY_CURRENT_USER\Identities\{EE383506-901D-43C6-8E40-9A61901DF7CC}\
Software\Microsoft\Outlook

Express\5.0. Add a new string key called WindowTitle and make its value the desired window title. Then close the registry editor, and restart

Outlook Express (if it's running.) Your new title now shows up in the title bar!


@CHANGING THE WINDOWS MEDIA PLAYER TITLEBAR:

This is a per-user tweak.
1. Open RegEdit.

2. Browse to the following key:
HKEY_USERS\S-1-5-21-xxxxxxxxx-xxxxxxxxx-xxxxxxxxxx-xxxx\
Software\Policies\Microsoft\WindowsMediaPlayer(the x's will vary from computer to computer, it's the key without the "_Classes" at the end)

3. Create the following String, "TitleBar" , the value of this will now become the TitleBar of Windows Media Player.


@TURN OFF INDEXING TO SPEED UP XP:
Windows XP keeps a record of all files on the hard disk so when you do a search on the hard drive it is faster. There is a downside to this and because the computer has to index all files, it will slow down normal file commands like open, close, etc. If you do not do a whole lot of searches on your hard drive then I suggest turning this feature off:

1. Control Panel
2. Administrative Tools
3. Services
4. Disable Indexing Services

Enjoy, Fast Browsing!!!!!!!!!!


@SPEED UP BOOT BY DISABLING UNUSED PORTS:
You may have tried many tweaks like modifying windowsXP start-up applications, prefetches, unload DLLs method,etc. And yes those methods do work for me.
I have just accidentally found out another way to give you an extra boost in windows XP's boot performance. This is done by disabling your unused devices in Device Manager. for example, if you don't have input devices that are connected to one of your USBs or COM ports, disabling them will give you an extra performance boost in booting.

Go to Control Panel -> System -> Hardware tab -> device manager

Disable devices that you don't use for your PC and then restart.


@CD ROM STOPS AUTOPLAYING/AUTORUN:
If the AutoPlay Tab has disappeared in My Computer, Devices With Removable Storage, Right Click on CDROM, Properties, Autoplay,Choose a appropriate action for yourself.

Now, Go to Control Panel, Administrative Tools, Services. The service: "Shell Hardware Detection" has been set to Manual or Disabled.

Return this service to "Automatic".

Tips And Tricks, Windows XP - Part 1


@STOP NOISE IN COPYING AUDIO CD:

When using 3rd party burning software (eg, Nero Burning Rom) to copy audio CD,some noise may be heard at the end of each track. To prevent this,try the following method:
1. Enter System Properties\device manager
2. Select IDE ATA/ATAPI controllers
3. Double click on thee CD writer IDE channel
4. Select advance setting
5. Change the transfer mode to 'PIO Only'
6. Restart Computer

You are done!!!


@RESTORING MEDIA PLAYER:

To restore Windows Media Player insert the the XP CD into the CD drive (if it autostarts click exit). Open a command window and type the following :
rundll32.exe setupapi,InstallHinfSection InstallWMP7 132 c:\windows\inf\wmp.inf


@RESTORING ACCESS TO CD ROM'S:

If you removed CD Burning software, or for some other mystical reason, can not longer access your CD ROM's, in most cases following registry keys needs to be deleted: Locate and delete the UpperFilters and LowerFilters values under the following key in the registry:
HKEY_LOCAL_MACHINE\SYSTEM\CurrentControlSet\Control\Class\
{4D36E965-E325-11CE-BFC1-08002BE10318}

Your CD ROM is good boy now!!!


@REMOVING USERNAME IN THE STARTMENU:

Open Registry Editor Then Go To :
1. "HKEY_CURRENT_USER\Software\Microsoft\Windows\CurrentVersion\Policies\Explorer"
2. On The Right, Make A New Entry With Right Click On Your Mouse Then Choose "New | DWORD Value"
3. Change The Entry's Name Into "NoUserNameInStartMenu", Double Click In The New Entry And Fill The "Value Data" With "1".
4. Press OK, Exit From The Registry Editor.
5. Restart Your Computer.

Oops!!! Where is your little picture in the start menu??!!!!!


@INTERNET EXPLORER LIGHTING-FAST STARTUP:

Isn't it annoying when you want to go to a new website, or any other site but your homepage, and you have to wait for your 'home' to load? This tweak tells Internet Explorer to simply 'run', without loading any webpages. (If you use a 'blank' page, that is still a page, and slows access. Notice the 'about:blank' in the address bar. The blank html page must still be loaded..). To load IE with 'nothing' [nothing is different than blank]:
1. Right-click on any shortcut you have to IE
[You should create a shortcut out of your desktop IE icon, and delete the original icon]
2. Click Properties
3. Add ' -nohome' [with a space before the dash] after the endquotes in the Target field.
4. Click OK
Fire up IE from your modified shortcut, and be amazed by how fast you are able to use IE!

Voillaa!!!!!!!!


@ORIGINAL WALLPAPERS:

This is more of a fun tweak than it is useful. Go to run, type regedit press ok. when that comes up go to HKEY_CURRENT_USER>Control Panel>Desktop
Now find the orginalwallpaper, right click and select modify.In the text box type the path to the file you want to be your orginal desktop wallpaper.


@REMOVE PAST ITEMS ICONS IN TASKBAR.
Some times When you check your TasKbar properties or when you hide or unhide icons you can see old icons from Uninstalled or old programs you dont have anymore. This Tweak will help you how to get rid of this problem. Here is how to clear the past items or icons list in the TaskBar, perform the following steps:
1.Open Regedit Navigate to:
HKEY_CURRENT_USER\Software\Microsoft\Windows\CurrentVersion\Explorer\TrayNotify
2.Delete the IconStreams and PastIconsStream values
3.Open Task Manager, click the Processes tab, click Explorer.exe , and then click End Process .
4.In Task Manager, click File , click New Task , type explorer , and then click OK .


continue....

Tips And Tricks, Windows XP - Part4


Disable Windows XP Boot Logo:

It is possible to disable the XP splash screen, which will slightly speed up the
overall boot process. Be aware that removing the splash screen will also cause
you not to see any boot-up messages that might come up (chkdsk, convert ... ),
but if your system runs without any problems then it should not matter.
Edit boot.ini.
Add " /noguiboot" right after "/fastdetect".

Upon restarting, the splash screen will be gone. It can be re-enabled by removing the new switch.


Clean Your Prefetch to Improve Performance:

This is a unique technique for WinXP. We know that it is necessary to scrub registry and TEMP files for Win9X/ME/2000 periodically. Prefetch is a new and
very useful technique in Windows XP. However, after using XP some time, the prefetch directory can get full of junk and obsolete links in the Prefetch catalog, which can slow down your computer noticeably.

Open C (system drive):/windows/prefetch, delete those junk and obsolete files,
reboot. It is recommended that you do this every month.


Performance Increase Through My Computer:

Easy enough tweak to usually find out about it on your own, but still, some of
us still don't find it right away. So here it is:
Start > right-click on My Computer and select Properties.
Click on the "Advanced" tab.
See the "Performance" section? Click "Settings".
Disable the following:

Fade or slide menus into view
Fade or slide ToolTips into view
Fade out menu items after clicking
Show Shadows under menus
Slide open combo boxes
Slide taskbar buttons
Use a background image for each folder type
Use common tasks in folders

There, now Windows will still look nice and perform faster.


Easy Way to Adjust LargeSystemCache:

Normally, the tweak I've seen asks you to go into
HKLM\System\CurrentControlSet\Control\Session Manager\Memory Management and
change the value to either O or 1 to the adjustment the LargeSystemCache.

However, in Windows XP, all you have to do is:

Right-click My Computer.
Select Properties.
Click Advanced.
Choose Performance.
Click Advanced again.
Select either Programs or System Cache under Memory Usage.
Programs = 0 for the registry tweak equivalent
System Cache = 1 for the registry tweak equivalent


Startup & Shutdown Windows XP More Faster:

Like previous versions of windows, it takes long time to restart or shutdown
windows XP when the "Exit Windows" sound is enabled. To solve this problem you
must disable this useless sound.

Click Start button.
Go to settings > Control Panel > Sound, Speech and Audio devices > Sounds and
Audio Devices > Sounds.
Then under program events and windows menu click on "Exit Windows" sub-menu and
highlight it. Now from sounds you can select, choose "none" and then click
Apply and OK.
Now you should see some improvements when starting up or shutting down your system.


Turn Off Autoplay for Program CDs:

How can you stop Windows XP from launching program CDs?

Click Start, click Run, type GPEDIT.MSC to open Group Policy in the Microsoft
Management Console.
Double-click Computer Configuration, double-click Administrative templates,
double-click System, and then click Turn off autoplay.
The instructions on your screen describe how to configure this setting. Click
Properties to display the setting dialog.
Click Enabled, and choose CD-ROM drives, then click OK, to stop CD autoplay.
This setting does not prevent Autoplay for music CDs.


Tips And Tricks, Windows XP - Part5


Turn Off Autoplay for Program CDs:

How can you stop Windows XP from launching program CDs?

Click Start, click Run, type GPEDIT.MSC to open Group Policy in the Microsoft
Management Console.
Double-click Computer Configuration, double-click Administrative templates,
double-click System, and then click Turn off autoplay.
The instructions on your screen describe how to configure this setting. Click
Properties to display the setting dialog.
Click Enabled, and choose CD-ROM drives, then click OK, to stop CD autoplay.
This setting does not prevent Autoplay for music CDs.


Turn off System Restore to Save Space:

By default, Windows XP keeps a backup of system files in the System Volume
Information folder. This can eat up valuable space on your hard drive. If you
don't want Windows to back up your system files:

Open the Control Panel.

Double-click on System.

Click the System Restore tab.

Check "Turn off System Restore on all drives".

Hit Apply.

You may now delete the System Volume Information folder.


Stop Jerky Graphics:

If you are connected to a LAN and have problems with jerky graphics, this might
be the solution:
Right-click "MyComputer".
Select "Manage".
Click on "Device Manager".
Double-click on your NIC under "Network Adapters".
In the new window, select the "Advanced" tab.
Select "Connection Type" and manually set the value of your NIC. (Not "Auto
Sense" which is default.).
You should reboot.


Increase Your Cable Modem or DSL Speed in XP:

This tweak is for broad band cable connections on stand alone machines with
WinXP professional version - might work on Home version also. It may also work
with networked machines as well.
This tweak assumes that you have let WinXP create a connection on install for
your cable modem/NIC combination and that your connection has tcp/ip - QoS -
file and print sharing - and client for Microsoft networks , only, installed.
It also assumes that WinXP will detect your NIC and has in-box drivers for it.
If it doesn't do not try this.
In the "My Network Places" properties (right-click on the desktop icon and
choose properties), highlight the connection
then at the menu bar choose "Advanced" then "Advanced Settings". Uncheck the
two boxes in the lower half for the bindings for File and Printer sharing and Client for MS networks. Click OK.


Adjust Various Visual Effects:

Open up the Control Panel.
Go under System and click on the Advanced tab.
Click settings under Performance options.
You can now change various graphical effects (mainly animations and shadows).


Synchronize Your Computer Clock with an Internet Time Server:

Does your computer have the right time? If your computer is not part of a
domain, you can synchronize your computer clock with an Internet time server.
To do so:
Double–click the time on your task bar.
Click the Internet Time tab.
Select the time server you want to use and make sure to select the Automatically
synchronize with an Internet time
server check box.


Disable Error Reporting:

Open Control Panel.
Click on Performance and Maintenance.
Click on System.
Then click on the Advanced tab.
Click on the error-reporting button on the bottom of the windows.
Select Disable error reporting.
Click OK. Click OK.

Some Benefits Of Bluetooth


Friends,Bluetooth is actually inexpensive
The technology of Bluetooth is cheap for companies
to implement , which results in lower costs for the
company . These savings are then passed from the
company on to you .
Standardized protocol
Bluetooth is standardized wireless , meaning that
a high level of compatibility among devices is
guaranteed . Bluetooth will connect devices to
each other , even if they aren't the same model .
Low energy consumption
As a result of Bluetooth using low power signals ,
the technology requires very little energy and will
use less battery or electrical power as a result .
This is an excellent benefit for mobile devices ,
as Bluetooth won't drain the battery .
Instant PAN 
You can connect up to seven Bluetooth devices to
each other within a range of up to 30 feet , forming
a piconet or PAN . For a single room , you can
also set up multiple piconets .
The technology stays
Bluetooth technology is a world wide , universal
wireless standard . With it being as popular as
it is , you can count on it being around for years
to come . As more and more devices start to use
Bluetooth technology , more manufacturers will be
eager to make their products compatible . A chain
reaction will occur , making Bluetooth the standard
for cutting edge wireless .
Upgradeable
Upgradeable is the standard for Bluetooth . There
are newer versions of Bluetooth in the works ,
which offer many new advantages and backward
compatible with older versions .
Sharing voice and data
The standard for Bluetooth will allow compatible
devices to share data and voice communications .
This is great for mobile phones and headsets , as
Bluetooth simplifies driving and talking on your
cell phone .
Low interference
Bluetooth devices almost always avoid interference
from other wireless devices . Bluetooth uses a
technique known as frequency hopping , and also
low power wireless signals .
Bluetooth is automatic
Bluetooth doesn't have you set up a connection or
push any buttons . When two or more devices enter
a range of
up to 30 feet of each other , they will
automatically begin to communicate without you
having to do anything .
These are some benifits of bluetooth technology .

How To Boot Windows XP So Fast


Friends ,follow some steps to do so :
Open notepad .exe , type "del c :|windows|prefetch|ntosboot-* .* /q" ( without the quotes ) & save as "ntosboot .bat" in c :|
From the Start menu , select "Run . . ." & type "gpedit .msc" .
Double click "Windows Settings" under "Computer Configuration" and double click again on "Shutdown" in the right window .
In the new window , click "add" , "Browse" , locate your "ntosboot .bat" file & click "Open" .
Click "OK" , "Apply" & "OK" once again to exit .
From the Start menu , select "Run . . ." & type "devmgmt .msc" .
Double click on "IDE ATA/ATAPI controllers"
Right click on
"Primary IDE Channel" and select "Properties" .
Select the "Advanced Settings" tab then on the device or 1 that doesn't have 'device type' greyed out select 'none' instead of 'autodetect' & click "OK" .
Right click on "Secondary IDE channel" , select "Properties" and repeat step 9 .
Restart your computer .
That's it .

TurboFTP

 Guys ,TurboFTP is a secure FTP client program for Windows 9x/ME/NT4/2000/XP/2003.
 It allows you to transfer files at turbo speed between your computer and virtually any FTP server with exceptional ease and when necessary , with strong encryption of industrial strength . The built-in Folder Synchronizer provides straightforward , visual and recursive comparison result and helps you synchronize files and directories between local and remote folders with minimum effort . Scheduled file transfer and automated folder synchronization can be easily achieved with the built-in Task Scheduler . You can have an notification e-mail sent to you upon completion of each schedule task or by error . It automatically attempts to resume broken transfer , redial and reconnect after detected lost of connection .
Connection Capability-Firewall support , including HTTP proxy , SOCKS 4 , SOCKS 4a
n SOCKS 5 .
including implicit and explicit SSL . Support client certificate .
Support secure FTP connection and file transfer with SSL/TLS .
OTP S/Key ( MD4 , MD5 ) password encryption .
Support SFTP ( Secure File Transfer Protocol ) over SSH2 .
Auto reconnect and broken transfer resume .
Strong interruption and stall protection and Auto Dial .
Anti-idle mechanism prevents connection time-out .
Passive mode support , configurable for
individual site .
Clipboard monitoring for FTP URLs
( ftp ://user :password@ftphost .com :port/path ) .
Remember recently connected sites for quick access .
Support redirected URLs .
Intuitive and Flexible Client Interface
A powerful Upload Wizard allows you to upload files right from Windows Shell using Shell context menu .
Context sensitive help .
Quick connect bar .
Windows XP compatible and XP theming .
FTP Connection Wizard .
Drag and drop to download/upload files ; drop to sub-folders .
Drag and drop from Windows Explorer .
File info tooltip ( useful for long filenames , and file size ) .
Show directory information ( number of selected files and all files , total size and free space ) in real time .
Minimize to system tray .
Built-in Sync Service Module for Scheduled FTP and SFTP File Replication and Synchronization
Run FTP and SFTP schedule task as a NT service .*
Run programs before and after a schedule task .
Support dependency of tasks .
Multiple simultaneous schedule tasks .*
Use different dialup connection for individual site .
Comes with a log file viewing tool - TurboLogViewer which offers many handy features like collapsing/expanding log • sessions , syntax highlighting , bookmarking etc , all making viewing and analysing log file much easier .
Mastering Your Web / FTP Site
Folder Synchronizer provides visual comparison of local and remote directory structures , where files to be transferred , updated or removed are clearly marked with action icons based on the selected Synchronization Scheme . After review and necessary modifications you can then update destination directory , including any subdirectories with one click .
Advanced Auto Upload ( AAU ) . Monitors a local folder and upload new files , updated files or both . Supports sub folders , filters and can run as NT service .*
Basic Auto Upload . Monitors a local folder and upload any new files that arrive in it .
Support on-the-fly data compression using MODE Z .
Simple local and remote directories compare .
Bookmarks - one-click access to any local/remote folder .
Automatic upload/download filename case conversion and Auto Rename .
Only download/upload newer files .
Recursive delete of remote directory .
Automatically and correctly resolve unix links .
Support UNIX , UNIX-compatible , DOS-style , VMS , VAX , OS/2 , AS-400 , Novell Netware ( v4 and onwards ) , VxWorks and Apple OS FTP directory listing .
Manually execute your own commands on remote server .
Automatically send user-defined FTP commands after logon .
Directory listing filtering that allows you to ignore files by directory or wildcards .
Show Owner and Group information of remote listing .
Report total size and number of files in a directory and all its subdirectories .
Show server file time in local time zone according to specified time offset .
Group select of files using wildcard .
Remote file attribute modification ( CHMOD ) .
Change server login password .
Remote editing - edit and update web page online .
Remote directory caching .
Management of Site Profiles
Site Address Book - sites organized in a tree structure . Easily organized with drag and drop , copy and paste .
Can import site information from CuteFTP , WS_FTP , Bulletproof FTP , LeapFTP and FTP Explorer . Support all formats of CuteFTP site information data file and can import passwords - tree .dat , smdata .dat , SM .dat .
Stored login passwords are encrypt .
Upload / Download
Recursive directory upload or download .
Scheduled transfer support , featuring comprehensive scheduling options and scheduled automated File Synchronization . Only download/upload files that are new or updated , delete downloaded files from remote server , etc . Ideal for automated file backup and mirroring . Built-in Schedule Sync Task Wizard makes creating a complex sync task a bleeze .
Send E-mail report upon schedule task complete.
Command line support .
A transfer queue that can handle files to/from any site and any directory .
Ability to preserve server file time on downloaded files .
Ability to transfer files larger than 4Gb.
Resume download/upload . Option to use APPE to resume uploads .
Download/upload speed limits - reserve bandwidth ( for e .g . web browsing ) while transferring files .
Upon transfer complete automatically hang up modem or shut down/ log off computer .
Select servers in Address Book to expand queued upload list to multiple servers .

Making Win Xp 60% Faster


Whenever you start your computer, you are faced with a few moments of thumb twiddling while Windows XP boots and prompts you to log on. Although you should expect to wait for a few moments, sometimes Windows XP seems to boot rather slowly. In fact, you may notice that over a period of time the PC that used to roar to life seems a bit sluggish instead. Fortunately, you can perform several techniques that help Windows XP get the bootup speed you want. This chapter explores how to put these techniques to work.

Some of the things may already have been discussed in some threads earlier

Stopping Unneeded Startup Services

Along with the core operating system and programs that Windows XP runs when it starts, there is also a host of services involved. Many of these services are necessary for Windows XP to operate correctly. However, many of them are for features in Windows XP that you may not use at all. You can peruse the services and disable any service that you do not want to run. The fewer services that run, the more quickly Windows XP will boot.

Caution: Exercise caution when stopping services. If you do not know what a service does or are unsure of the ramifications of stopping the service, leave it alone. Some services are critical to Windows XP's operations, so make sure you understand what the service is before you disable it.

To reduce the number of services that start on bootup, you can access two different areas of Windows XP. The first is the System Configuration Utility. The Services tab shows you the services that start when the computer boots.

You can stop a service from starting by simply clearing the check box next to the service and clicking OK. However, before you do so, there is another way to disable services that you may prefer because the interface gives you more information about the service in question.

Open Control Panel/Administrative ToolsServices or else select Start/Run, type services.msc, and click OK. Either way, you see the Services console.

I prefer to use the Services console instead of the System Configuration Utility because it describes what the service does. Additionally, you can double-click a service and examine its properties.

Notice the Startup Type column in Figure 4-2. This information lists whether the service is automatic or manual. Manual services are only started in Windows XP when you start a process that requires the service. Some other process may require the service that has a "dependency" relationship with it; in this case, the dependency service will start, as well. Because these services do not start automatically when you boot Windows XP, you do not need to do anything with manual services.

However, all services listed as automatic start when Windows XP boots. These are the services that increase boot time. As I have mentioned, many of them are necessary and important, so you should not stop automatic services from booting unless you are sure of the ramifications. You can get this information by looking at the Description column. Here's a quick look at common services you may want to live without:

Automatic Updates: This service enables Windows XP to check the Web automatically for updates. If you don't want to use
Automatic Updates, you can disable the service. You can always check for updates manually at the Windows Update Web site.

Computer Browser: If your computer is not on a network, you don't need this service. If you are on a network, leave it alone.

DHCP Client: If you are not on a network, you do not need this service. If you are on a small workgroup, you can still increase boot time by configuring manual IP addresses (which I explore later in this chapter).

DNS Client: If you are not on a network, you do not need this service. If you are, leave it alone.

Error Reporting and Event Log: You don't have to use these services but they can be very helpful, so I would leave them configured as automatic.

Fax: If you don't use your computer for fax services, you can disable this one. Help and Support: If you never use the Windows XP

Help and Support Center (found on the Start menu), you can disable this service.

IMAPI CD-Burning COM: This service enables you to burn CDs on your computer. If you never burn CDs, you can disable the service.

Indexing Service: Your computer keeps an index of files but if you rarely search for files, the service is just a resource hog. You can stop it and turn the service to manual.

Windows Firewall/Internet Connection Sharing: If you do not use these features, you can disable them.

Infrared Monitor: If you do not use infrared devices, you can disable this service.

Messenger: This service sends alert messages on a local area network (it is not the same as Windows Messenger). If you are not on a network, you can disable this service.

Print Spooler: If you do not do any printing from the computer, you can disable this service. If you print, make sure you leave it as automatic.

Remote Registry: This service allows remote users to modify the Registry on your computer. If you are not on a network, you can disable this service.

System Restore Service: This service allows you to use System Restore. If you have turned off System Restore anyway, you do not need to turn off the service. If you do, you turn off System Restore.

Themes: If you do not use themes, you can disable this service.

Windows Image Acquisition: If you do not use scanners or digital cameras, you can disable this service.

Wireless Zero Configuration: If do not use wireless networking devices, you can disable this service.

You may have a number of other automatic services, depending on software and other configurations on your computer. So it's a good idea to look through the services and learn more about them. If you double-click a service, a Properties dialog box appears

Notice that on the General tab, you see a Startup Type drop-down menu. If you want to change an automatic service to manual, select Manual here and click OK. As a general rule, don't disable a service unless you are sure you will never use it.

However, manual configuration allows the service to be started when you find it necessary, thus speeding up your boot time. However, before you change a service to manual, look at the Dependencies tab (see Figure 4-4). This tab shows you which other services depend upon the service you are considering changing.

Keep in mind that services are necessary for the vast functionality you get with Windows XP. Change only those services that you understand and do not use. How you use your Windows XP computer should be the best guide in terms of optional startup services.

Tip:

The Indexing service and the System Restore service take up a lot of disk space and system resources across the board.
You can live without the Indexing service but I suggest that you keep using System Restore. It works great when you are in a bind and this is one case where the loss of speed may not be worth the ramifications of not using System Restore. Speed Tips and Tricks for Windows XP Startup Aside from startup programs, services, and the Prefetch folder, there are a number of other startup procedures and issues you can modify to help Windows XP start faster. The following sections explore those tips and tricks. Manual IP Addressing on Small Office/Home Networks Windows XP is configured to help you take care of networking. It uses the TCP/IP protocol for networking in workgroups, or what you might call small office or home networks that do not use a dedicated server. The problem is that automatic IP addressing can be slow. When your computer boots, it has to query the network to see what IP addresses are already in use and then assign itself one. If you want to speed up the boot time a bit, consider manually assigning IP addresses to all computers on the network. This way, the network computers do not have to worry about locating an automatic IP address. Because one is manually configured, the operating system doesn't have to spend time solving this problem. This isn't a networking book, however, so I won't delve into the implications of using a manual IP address, but if you are using a computer that functions as a host computer to the Internet (using Internet Connection Sharing [ICS]), you can get into connectivity problems if you change the configuration of the IP address. However, you can still work around this problem by starting with the ICS host computer. Select Start/Connect To/Show All Connections. Right-click your network adapter card and click Properties. On the General tab, select TCP/IP in the list of services and click the Properties button. In the TCP/IP properties, you can see if you use an automatic or manual IP address. In the example in Figure 4-5, I have configured a manual IP address of 90.0.0.1 and a default subnet mask. The other computers on my office network each use a different IP address in the same class, such as 90.0.0.2, 90.0.0.3, 90.0.0.4, and so on. This way, each computer has a permanent IP address, which helps increase boot time. Note that if you change the IP addresses of your computers, they must all use the same subnet mask. A default subject mask of 255.255.255.0 will keep you in good shape. Make sure you understand the implications of changing IP addresses on your network. If you have no networking experience at all, you may be wiser to leave the automatic IP addressing as is and try to gain some speed using the additional suggestions in this chapter. Disabling Recent Documents History Windows XP includes a feature that keeps track of all recent documents you have opened or used. The idea is that you can select Start/Recent Documents History and quickly reopen any document you have recently used. I use many documents each day and never use the feature myself. In my opinion, I can keep up with what I want to use without Windows XP doing it for me. The bad thing about Recent Documents History is that Windows XP has to calculate what should be put there each time you boot Windows, which can slow things down. So, if you never use the Recent Documents History, it's a good idea to disable it.

Here's how:
1. Open the Registry Editor (select Start/Run, type regedit, and click OK).
2. Navigate to HKEY_CURRENT_USER\Software\Mcft\Windows\ CurrentVersion\Policies\Explorer.
3. Create a NoRecentDocsHistory D_WORD key. Double-click the value to open it once it is created.
4. Set the Data Value to 1 to enable the restriction.
5. Click OK and close the Registry Editor. You'll need to restart the computer for the change to take effect. Disabling the Boot Logo You can remove the boot logo that appears when you start Windows XP. This little tweak probably shaves only a few seconds off your boot time but seconds count if you are serious about trying to get Windows XP up and running as quickly as possible. The only negative is that if you remove the boot logo, you will also not see any boot messages, such as check disk. (But if you are not having problems with your computer, this isn't such a big deal.)
To remove the boot logo, follow these steps:
1. Select Start/Run, type msconfig, and click OK.
2. In the System Configuration Utility, click the BOOT.INI tab.
3. On the BOOT.INI tab, click the NOGUIBOOT check box option. Click OK. Removing Unwanted Fonts One trick that increases your boot time a bit is to lose any fonts in the Fonts folder in Control Panel that you never use. The more fonts you have, the more processing Windows XP has to do to prep all of those fonts for use. You must be a bit careful here to not remove fonts that you might want, but there is a good chance that you can live without many of them. For instance, you may have foreign language fonts and other symbol fonts (such as Wingdings) that you never use. To delete unneeded fonts, follow these steps:
1. Open the Fonts folder in Control Panel.
2. Select Edit/Select All and then Edit/Copy.
3. Create a new folder on your desktop, open it, and select Edit/Paste.
4. In this new folder, delete any of the fonts you do not want.
5. Return to the Fonts folder in Control Panel. Right-click the selected fonts and click Delete.
6. Go back to your new desktop folder and click Edit/Select All.
7. Return to your Fonts folder and click Edit/Paste. You now have only the desired fonts in the Fonts folder. Tip: You can directly delete fonts from the Fonts folder without creating the secondary folder. However, I recommend the preceding steps to help ensure that you do not make a mistake in the deletion process. Stopping Remote Assistance and Remote Desktop Sharing In Windows XP Professional, you have two remote networking features called Remote Assistance and Remote Desktop Sharing. These remote networking features are very helpful in a variety of situations but if you don't use them, it is good idea to disable them to save boot time. You can always enable them later if you want to use them. Note: If you are interested in using Remote Desktop or Remote Assistance, see my book Windows XP for Power Users: Power Pack published by John Wiley & Sons.
1. Open the Start menu, right-click My Computer, and choose Properties.
2. Click the Remote Tab.
3. Clear both check boxes to disable Remote Assistance and Remote Desktop. Speeding Up the Dual-Boot Timeout If you dual-boot your computer with Windows XP and another operating system, you see an operating system selection menu on startup. If you typically boot into Windows XP and not the other operating system, you can speed up the dual-boot timeout value so that you do not wait so long for the boot process to select your default operating system and continue with the boot process. The default timeout value is 30 seconds but you can change this setting to 10. This gives you enough time to select the alternate operating system if you want but also speeds up the boot process. You can skip this section if you do not use a dual-boot configuration.
Follow these steps:
1. Locate the boot.ini file on your computer. It is a hidden file by default; mine is located in C:\boot.ini.
2. Open the file with Notepad (which is what opens it by default).
3. Change the Timeout value to 10 (see Figure 4-11).
4. Select File/Save and close Notepad. Speeding Up Your PPPoE Connection If you use a Point-to-Point Protocol connection over Ethernet (PPPoE), you may notice a delay in using the PPPoE connection after startup. By default, there is a 120 second delay but you can stop this behavior by manually configuring an IP address for the network adapter card. If you do not use a PPPoE connection, you can skip this section.
1. Select Start/Connect to/Show All Connections.
2. Open the TCP/IP properties for your LAN network interface card.
3. Manually set the IP address on the TCP/IP properties to an appropriate IP address and subnet mask for your network. Reducing the Wait Time When you start to shut down Windows XP, it has to quit, or "kill," any live applications or processes that are currently running. So close all applications first. However, some applications and processes are always running in the background. You can reduce the amount of time that Windows XP waits for those applications and processes to close before Windows XP kills them. Edit three different Registry settings to change this:
1. Open the Registry Editor.
2. Navigate to HKEY_CURRENT_USER\Control Panel\Desktop. Select WaitToKillAppTimeout and set the value to 1000.
3. Select the HungAppTimeout value and set it to 1000 as well. 4
. Navigate to HKEY_USERS\.DEFAULT\Control Panel\Desktop. Set the WaitToKillAppTimeout and set the value to 1000. Select the HungAppTimeout \newline value and set it to 1000 as well.
5. Navigate to HKEY_LOCAL_MACHINE\System\CurrentControlSet\Contro l. Select the WaitToKillServiceTimeout value and set it to 1000.
6. Close the Registry Editor. Automatically Killing Tasks on Shutdown You know the drill. You start to shut down the computer, you wait a few moments, and then you see a dialog box asking if you want to kill an application or service that is running. Instead of prompting you, you can make Windows XP take care of the kill task automatically. Here's how:
1. Open the Registry Editor.
2. Navigate to HKEY_CURRENT_USER\Control Panel\Desktop.
3. Highlight the value AutoEndTasks and change the value to 1.
4. Close the Registry Editor.

Make your wndows Xp GENUINE.!!

This will allow you to bypass the Microsoft Genuine Validation thingythis method works better than many others i've tried before.
forget the cracks and injectors etc... this is the BEST WAY:
1) start > run > "regedit" (without the quotes of course)
2) go to the key:HKEY_LOCAL_MACHINE\SOFTWARE\MICROSOFT\Windows NT\CurrentVersion\WPAEvents\OOBETimer...and doubleclick on it.
Then change some of the value data to ANYTHING ELSE...delete some, add some letters, I don't care...just change it!now close out regedit.
3) go to start > run > "%systemroot%\system32\oobe\msoobe.exe /a" (again, dont type the quotes)
4) the activation screen will come up, click on register over telephone, then click on CHANGE PRODUCT KEY, enter in this key: JG28K-H9Q7X-BH6W4-3PDCQ-6XBFJ.
Now you can dl all the updates without activating,
and the Genuine Microsoft Validation thingy won't bug you no more!!
Works with most WinXP versions though ther r some exceptions...

Way to get XP product CODE from CD


It really work
There is a way to get the xp product code from the cd
just explorer the cd then
open the folder I386
then open the file UNATTEND.TXT and
scroll down to the last line
and it goes to show what dumbasses microsoft are u have a product code.
Have fun u never need to search for a product code for xp again...!!!!

Create Your Own Logon Message


1 Click start
click run
type regedit,
then click ok!

2 In The registry editor, drill down to the following key:
hklm\software\Microsoft\Windows NT\Current version\Winlogon.

3 Right click LegalNoticeCaption,
click modify,
Type: THIS IS NEXT TRICK,and then click ok!

4 Right click legalNoticeText,
click modify, and then Close your message!

5 Restart Your Computer.

6 The message will appear every time you logon!

Disable CD Burning


Exciting isn't it?

The user can't burn any CDs by this trick. This restriction will disable the use of the inbuilt CD recording functions of Windows.

Open your registry and follow this path: HKEY_CURRENT_USER>Software>Microsoft>Windows>Current Version>Policies>Explorer and
create this key: "NoCDBurning" and set its value to 1. Close you registry and logout/restart your system for the change to take the effect.

Create A Hidden User Account

Create A Hidden User Account
This tweak allows an account that is normally displayed on the Welcome screen to be hidden from view. To log on using the account it's necessary to use the Log On To Windows dialog box similar to the one in Windows 2000. #[Start] [Run] [Regedit]#Registry Key:

HKEY_LOCAL_MACHINE\SOFTWARE\Microsoft\WindowsNT\CurrentVersion\Winlogon\SpecialAccounts\UserList#Modify/Create the Value Data Type(s) and Value Name(s) as detailed below.#Data Type: REG_DWORD [Dword Value] // Value Name: Type Name of Account to be Hidden#Setting for Value Data: [0 = Account is Hidden / 1 = Enabled]#Exit Registry and Reboot...

While the account is hidden on the Welcome screen, note that the account profile will be visible in C:\Documents and Settings or wherever user profiles are stored as well as in Local Users and Groups

Keeping the Windows XP Core in the RAM

If you have 512 MB or more of RAM, you can increase system performance by having the Windows XP 'Core' kept in the RAM instead of paged on the hard disk.

Go to Start -> Run - Type regedit and press enter - On the left hand side tree, navigate to

HKEY_LOCAL_MACHINE\SYSTEM\CurrentControlSet\Control\Session Manager\Memory Management\

- On the list on the right side, look for an entry called 'DisablePagingExecutive'
- Double click it
- Press 1 on your keyboard
- Click OK
- Exit regedit and reboot the computer

To revert to the default setting, follow the same steps as above, but this time, press 0(zero) instead of 1 on the keyboard.

Error Reporting in XP


If error reporting in XP is bugging you then turn it off.

When a system error occurs in XP, a little dialog box appears asking if you want to report the error to Microsoft. Click the message box to make it disappear. You don't have to report the error if you don't want to and on today's "Call for Help" Leo shows you how to turn off the feature if you find it distracting.

To disable error reporting, follow these directions:

1. Right-click My Computer and choose Properties.
2. Click the Advanced tab on your System Properties dialog box.
3. Click the Error Reporting button on the Advanced tab.
4. Place a checkmark next to "Disable error reporting."
5. Leave the other radio button unchecked next to the text labeled, "But notify me when critical errors occur."
6. Click OK.

Does When u Double click on Drive... New Window opens?

Whenever ppl double-click on any folder in Computer,
it opens in a new window even if selected the option “Always open folders in same window” in “Tools -> Folder Options”.
For this kind of Problem
Download following zip file, extract it and then run .REG file and confirm the action:
Download

How to Reset or Remove Bios Password

Many people use BIOS password to lock up their computers, making them completely unusable without entering the correct password. This password has to be entered before loading the operating systems, normally on a DOS screen shortly after the computer started. BIOS password is usually stored together with other BIOS settings such as the time, date, size of hard disk, etc. These pieces of data are usually stored in a flash chip on the motherboard.
bios reset
To reset or remove the BIOS password, look for a jumper which usually can be found near the processor or BIOS battery on the motherboard. After locating the jumper (usually with a label – PSWD beside it), move the jumper from connected pins 1+2 to pins 2+3 for a few seconds or so, then move back to pins 1+2. This will reset the entire BIOS settings. The next time you boot your computer, the BIOS will show you the default factory settings and from there you can optionally set a new password.
If you’re either not allowed to touch the motherboard or can’t find any jumper on the motherboard, you can reset or remove the bios settings via DOS if you have access to it.
Here’s how you can do it:
Type debug
‘Type o 70 2e
Type o 71 ff
Type q
Taa da! Your machine’s Bios has been reset. Restart your computer now and everything should run just fine.
Another alternative way to completely reset your bios setting is to re-insert the CMOS battery which can be found on the motherboard. The CMOS battery provides power supply to the motherboard in order to hold the Bios Setting data. That said, when you remove the CMOS battery, everything stored will be reset to the factory default setting. You can do this when you have no access to DOS.
remove inset cmos battery reset bios