01. Matrix Command
Choose layout, and change the height and width of the window size to 300. If you want to make the 300 default, right click on the top bar again, choose defaults, choose layout again, and make the height and width 300.
Keep in mind:
Have Fun!
02. Super Hide the files Using Command Prompt
All of us want to hide some files, movies and the stuff we want from others. Many of us make the attributes of the file as hidden and make it invisible through the folder options. But every computer user knows it. I know on using other’s computer almost all of us enable showing hidden files to see what secret content he has, Don’t you ? But there exists a trick with which you can hide your content from others. Let me give you that……….
Well, If you are a command line lover, then I do not need to tell you about this. If you are not, you are welcome here. There is a command called attrib in the Command Prompt in Windows. Operation of this command is to show the attributes of the file like read only, system file ,hidden and many more. With this command you can set and change the attributes of the complete folder and the file too.
You need to traverse to the directory where your content is saved, say it is the folder A.
Then,
I will type “attrib A +s +h +a” to make it super hidden.
For, accessing A there are two methods,
1st- reset the attributes of the file/folder by the command ”attrib A -a -s -h”
2nd – Traverse to the directory where the your file /folder is located, in the explorer address click, if you are using Windows 7 you will see that the address has changed to older WIndows style path, here you only need to extend the address by \A where A is the name of the folder. If it is a file, enter its name with its extension.
I prefer using second as after 1st time, your manually entered address gets into the history and you can use it when you want. You can also create the batch file to automate the 1st step.
Now, comes the explanation, by apping these attributes, you actully change the file/folder into a system folder having special securoty apart form the hidden files.
Remmeber, If someone enables viewing system files, you will be caught….
But, not everyone likes to see the system files to temper with it, specially in Windows.
So, Try IT.
03.Change the color of the Command Prompt
If by mistake you took my last post seriously about learning the commands of the command prompt, then you really do not need to read this stuff. I was searching something in google, I visited a blog where the author had written about “MATRIX COMMAND PROMPT”, it was a catchy headline, I visited the article, the author told about the green window of the matrix movie and he provided a bat file where he changed the font color and generated some random number. It was really a miss. Okay I am here to tell you how to give a new life to your cmd if you love working with it.
There is a command called color incommand prompt used to change the color of the fonts in Command Prompt. From help menu of the color command you can get the color codes.
For example if you write
color 1
it will change the white font color to blue.
After trying all the color codes you can get the one you like. But this is not enough, you can change the background color too.
For this, you need to right click the title bar of the Command Prompt. From here you need to select its properties.
From the properties windows that will be opened, U need to select the colors tab.
Here, u will see the Screen Background, Select the desired background color.
Congratulations, you have given your Cmd a new look.
04.Chat With Command Prompt
05.Hidden Programs In Windows XP !
Is it strange to hear , but true that some good programs are hidden in Windows XP !!!
Programs :
1. Private Character Editor :
Used for editing fonts,etc.
** start>>Run
** Now, type eudcedit
2. Dr. Watson :
This an inbuilt windows repairing software !
** start>>Run
** Now, type drwtsn32
3. Media Player 5.1 :
Even if you upgrade your Media Player, you can still access your old player in case the new one fails !!!
** start>>Run
** Now, type mplay32
4. iExpress :
Used to create SetupsYou can create your own installers !
** start>>Run
** Now, type iexpress
06.Install Xp From Dos
If XP will not install from the CD or if you have a new drive with no operating system on
it yet try these:
Install Windows XP from the hard drive with Windows 98 already installed:
Boot Windows 98
Insert the XP CD into your CD reader
Explore Windows XP through My Computer
Copy i386 folder to C:\
Go into C:\i386 folder and double click on winnt32.exe to launch the setup from the hard drive
Install Windows XP from DOS (ie. no OS on a new hard drive):
Boot with a Windows 98 Start Up disk
Insert the Windows 98 CD into the CD reader
Run smartdrv.exe from the Win98 directory on the windows 98 CD (file caching)
Type cd.. to back up to the root directory
Insert Windows XP CD into the CD reader
Copy the i386 folder to C:\
Go into C:\i386 folder on C: and type winnt.exe to launch the setup from the hard drive.
07.Hide Files or Folders Using Command Prompt
The most important thing is that, once hidden with this method, the files/folders cannot be viewed by any search options even if you click "Show All Hidden Files and Folders".
Hiding the most wanted files and folders is very important nowadays and it's really a tedious job too. In order to make this tedious job an easy one, i'm going to deliver you a the trick now.
For Example: You have a folder named "collegephotos" and this folder is stored in (Disk Drive E). You think that it should not be seen by strangers who use your PC.
For that you need to follow the following instructions
08.Command Prompt on Right-Click
Many computer users, specially the programmers, need to launch a command prompt window every once in a while to execute some dos/shell commands. The problem is, when a command prompt window launched, the default path is normally the system path or the user profile's path. The users will then have to do all the "cd" commands to change the directories to the path he/she wants.
This trick shows you how to add an option called "Command Prompt" when you right-click on a folder in Windows. With this option, a Command Prompt Window will launch and its current directory will be the path to the folder you've selected.
Use this trick at your own risk.
Here's what you'll get:

The Solution
You can either edit your registry OR download the registry file and apply it on your computer.
Method I. Manually edit the registry:

With the CD-ROM available on almost every computer nowaday, floppy drives become a history. However, for those who find computers a hobby, might run into a situation when they need to create a bootable CD that works just like the old floppy disk. Unfortunately, to do this, you still need a floppy drive to read your bootup floppy disk. Wait, the good news is, you can just down load a bootable ISO image and burn it to a CD. And even better, we have a copy of an ISO image right here. You can download this image and follow the instructions below, or you can do a web search for more options.
The information on this article will guide you step-by-step how to create a bootable CD/DVD, either using a bootup floppy disk or a boot image file. You will end up having a bootable CD or DVD, with CD-ROM driver supported, that could startup your PC and bring up the command prompt. This is going to be a good starting point, then you can run other utilities such as hard drive ghost, etc..
Many current CD/DVD burning software support the bootable feature. If you already have your favorite burning software, look around to find the bootable option. For this article, I will use the steps and sample screen-shots with the burning tool called Nero.
You will need a boot disk (floppy) or a bootable ISO image to start. If you don't have one, you can download an ISO image here. This boot image is Windows-98 based, which means it uses the Windows 98 bootup sequence, which should do what we need. You can also download different boot disk images from the internet. I've found bootdisk.com has a very good collection.
I assume that you already have Nero installed. Also, it is highly recommended to use a rewritable disc so you can redo the process if you have to.
Related Articles:
Create a boot image from a floppy boot disk
 Friends ,here is some useful shortcuts run commands for you .
SHIFT+DELETE ( Delete the selected item permanently without placing the item in the Recycle Bin )
CTRL+C ( Copy )
CTRL+X ( Cut )
CTRL+V ( Paste )
CTRL+Z ( Undo )
CTRL while dragging an item ( Copy the selected item )
CTRL+SHIFT while dragging an item ( Create a shortcut to the selected item )
F2 key ( Rename the selected item )
CTRL+RIGHT ARROW ( Move the insertion point to the beginning of the next
word )
CTRL+LEFT ARROW ( Move the insertion point to the beginning of the previous word )
CTRL+DOWN ARROW ( Move the insertion point to the beginning of the next paragraph )
CTRL+UP ARROW ( Move the insertion point to the beginning of the previous paragraph )
CTRL+SHIFT with any of the arrow keys ( Highlight a block of text )
ALT+Underlined letter in a menu name ( Display the corresponding menu )
Underlined letter in a command name on an open menu ( Perform the corresponding command )
F10 key ( Activate the menu bar in the active program )
RIGHT ARROW ( Open the next menu to the right , or open a submenu )
LEFT ARROW ( Open the next menu to the left , or close a submenu )
F5 key ( Update the active window )
BACKSPACE ( View the folder one level up in My Computer or Windows Explorer )
ESC ( Cancel the current task )
SHIFT when you insert a CD-ROM into the CD-ROM drive ( Prevent the CD-ROM from automatically playing )
CTRL+A ( Select all )
F3 key ( Search for a file or a folder )
ALT+ENTER ( View the properties for the selected item )
ALT+F4 ( Close the active item , or quit the active program )
ALT+ENTER ( Display the properties of the selected object )
ALT+SPACEBAR ( Open the shortcut menu for the active window )
CTRL+F4 ( Close the active document in programs that enable you to have
multiple documents open simultaneously )
ALT+TAB ( Switch between the open items )
ALT+ESC ( Cycle through items in the order that they had been opened )
F6 key ( Cycle through the screen elements in a window or on the desktop )
F4 key ( Display the Address bar list in My Computer or Windows Explorer )
SHIFT+F10 ( Display the shortcut menu for the selected item )
ALT+SPACEBAR ( Display the System menu for the active window )
CTRL+ESC ( Display the Start menu )
CTRL+TAB ( Move forward through the tabs )
CTRL+SHIFT+TAB ( Move backward through the tabs )
TAB ( Move forward through the options )
SHIFT+TAB ( Move backward through the options )
ALT+Underlined letter ( Perform the corresponding command or select the
corresponding option )
ENTER ( Perform the command for the active option or button )
SPACEBAR ( Select or clear the check box if the active option is a check box )
Arrow keys ( Select a button if the active option is a group of option buttons )
F1 key ( Display Help )
F4 key ( Display the items in the active list )
BACKSPACE ( Open a folder one level up if a folder is selected in the Save As
or Open dialog box )
Windows Logo+F ( Search for a file or a folder )
CTRL+Windows Logo+F ( Search for
A true computer genius knows all about commands of Command Prompt. You can guess its importance by the fact that though a better Graphical User Interface is being provided by the Microsoft in Windows but still Windows have Command Prompt in it. It enables you a lot of tricks by creating batch files, some hacking also. I am not going to tell you how you can use Command Prompt for hacking but I am here to tell you how to have a good command at Command Prompt. I will tell U way how U can get the complete information about a command in Cmd.
Command Prompt needs a lot of your memory so that you can easily remember many commands of the Command Prompt. It has a lot of Commands that need to be used and practiced by you. Now, first thing that you must know for having a good command over command prompt is of course is the list of commands that Command Prompt provides.
You can get it by typing only help in the command prompt.It will give the list of commands.
Secondly, you need to select a command that you want to know. For example, I want to know about net command. It is a great command whose utility I will tell you some other day. So, I want to know about net command, I will write “help net” in the command Window. Sometimes the help section of the particular command is quite large. Then, it becomes quite painful to see all the details of a particular command. For this, there is also a way, you need to write
help command-name |more
After all if you feel lazy to type then I have something for you.
You need to write “commad-name /?”
That’s all my friend.
And of course, do not forget about Internet, the Ultimate Knowledge Source, you will get more from here than the command Window.
Keep Learning…………………………

My
last Instructable with the Matrix was only with the letters, but this
one is a batch file that uses numbers, and looks more realistic. The
real Matrix used Japanese letters and other symbols, but this one just
uses numbers in different orders and sizes and it looks more realistic
from my last Instruct-able.
It is pretty easy so lets get to it.
It is pretty easy so lets get to it.
Step 1What Technology do I need?

You need:
- PC with command prompt
- The notepad application
- The code I will give you
Step 2The Code

Ok, to enter the code, you have to open the Notepad.
Enter this code:
@echo off
color 0a
:top
echo %random% %random% %random% %random% %random% %random% %random% %random% %random% %random% %random% %random% %random% %random%
goto top
Enter this code:
@echo off
color 0a
:top
echo %random% %random% %random% %random% %random% %random% %random% %random% %random% %random% %random% %random% %random% %random%
goto top
- Make sure the %random% is in one line across the screen, don't let it go to another line.
Step 3Save it as .bat

Save the notepad file on to your Dekstop as a .bat file.
Save it as:
matrix.bat
You have to have the .bat at the end for this to work, because .bat is batch and batch is used with the command prompt.
Save it as:
matrix.bat
You have to have the .bat at the end for this to work, because .bat is batch and batch is used with the command prompt.
Step 4Open it and let it run


Open it on your desktop and let it run!!!
Show it to your friends and watch them be amazed.
Show it to your friends and watch them be amazed.
Step 5Making Screen Bigger
If you want to make it full screen, right click on the top blue bar, and click properties.


Choose layout, and change the height and width of the window size to 300. If you want to make the 300 default, right click on the top bar again, choose defaults, choose layout again, and make the height and width 300.
Keep in mind:
- If you make the screen bigger, you will have to add more: %random% to the code.
Have Fun!
02. Super Hide the files Using Command Prompt
All of us want to hide some files, movies and the stuff we want from others. Many of us make the attributes of the file as hidden and make it invisible through the folder options. But every computer user knows it. I know on using other’s computer almost all of us enable showing hidden files to see what secret content he has, Don’t you ? But there exists a trick with which you can hide your content from others. Let me give you that……….
Well, If you are a command line lover, then I do not need to tell you about this. If you are not, you are welcome here. There is a command called attrib in the Command Prompt in Windows. Operation of this command is to show the attributes of the file like read only, system file ,hidden and many more. With this command you can set and change the attributes of the complete folder and the file too.
You need to traverse to the directory where your content is saved, say it is the folder A.
Then,
I will type “attrib A +s +h +a” to make it super hidden.
For, accessing A there are two methods,
1st- reset the attributes of the file/folder by the command ”attrib A -a -s -h”
2nd – Traverse to the directory where the your file /folder is located, in the explorer address click, if you are using Windows 7 you will see that the address has changed to older WIndows style path, here you only need to extend the address by \A where A is the name of the folder. If it is a file, enter its name with its extension.
I prefer using second as after 1st time, your manually entered address gets into the history and you can use it when you want. You can also create the batch file to automate the 1st step.
Now, comes the explanation, by apping these attributes, you actully change the file/folder into a system folder having special securoty apart form the hidden files.
Remmeber, If someone enables viewing system files, you will be caught….
But, not everyone likes to see the system files to temper with it, specially in Windows.
So, Try IT.
03.Change the color of the Command Prompt
If by mistake you took my last post seriously about learning the commands of the command prompt, then you really do not need to read this stuff. I was searching something in google, I visited a blog where the author had written about “MATRIX COMMAND PROMPT”, it was a catchy headline, I visited the article, the author told about the green window of the matrix movie and he provided a bat file where he changed the font color and generated some random number. It was really a miss. Okay I am here to tell you how to give a new life to your cmd if you love working with it.
There is a command called color incommand prompt used to change the color of the fonts in Command Prompt. From help menu of the color command you can get the color codes.
For example if you write
color 1
it will change the white font color to blue.
After trying all the color codes you can get the one you like. But this is not enough, you can change the background color too.
For this, you need to right click the title bar of the Command Prompt. From here you need to select its properties.
From the properties windows that will be opened, U need to select the colors tab.
Here, u will see the Screen Background, Select the desired background color.
Congratulations, you have given your Cmd a new look.
04.Chat With Command Prompt
If you want personal chat with a friend
you don't need to download any yahoo messenger
All you need is your friends IP address and Command Prompt.
All you need is your friends IP address and Command Prompt.
Firstly, open Notepad and enter:
@echo off
:A
Cls
echo MESSENGER
set /p n=User:
set /p m=Message:
net send %n% %m%
Pause
Goto A
Now save this as "Messenger.bat". Open the .bat file and in Command
Prompt you should see:
MESSENGER
User:
After "User" type the IP address of the computer you want to contact.
After this, you should see this:
Message:
Now type in the message you wish to send.Before you press "Enter" it should look like this:
MESSENGER
User:27.196.391.193
Message: Hi
Now all you need to do is press "Enter", and start chatting!
05.Hidden Programs In Windows XP !
Is it strange to hear , but true that some good programs are hidden in Windows XP !!!
Programs :
1. Private Character Editor :
Used for editing fonts,etc.
** start>>Run
** Now, type eudcedit
2. Dr. Watson :
This an inbuilt windows repairing software !
** start>>Run
** Now, type drwtsn32
3. Media Player 5.1 :
Even if you upgrade your Media Player, you can still access your old player in case the new one fails !!!
** start>>Run
** Now, type mplay32
4. iExpress :
Used to create SetupsYou can create your own installers !
** start>>Run
** Now, type iexpress
06.Install Xp From Dos
If XP will not install from the CD or if you have a new drive with no operating system on
it yet try these:
Install Windows XP from the hard drive with Windows 98 already installed:
Boot Windows 98
Insert the XP CD into your CD reader
Explore Windows XP through My Computer
Copy i386 folder to C:\
Go into C:\i386 folder and double click on winnt32.exe to launch the setup from the hard drive
Install Windows XP from DOS (ie. no OS on a new hard drive):
Boot with a Windows 98 Start Up disk
Insert the Windows 98 CD into the CD reader
Run smartdrv.exe from the Win98 directory on the windows 98 CD (file caching)
Type cd.. to back up to the root directory
Insert Windows XP CD into the CD reader
Copy the i386 folder to C:\
Go into C:\i386 folder on C: and type winnt.exe to launch the setup from the hard drive.
07.Hide Files or Folders Using Command Prompt
User Submitted. Thanks S.V.Vignesh Raaj (View Thread) Trick to hide files and folders using Command Prompt
The most important thing is that, once hidden with this method, the files/folders cannot be viewed by any search options even if you click "Show All Hidden Files and Folders".
Hiding the most wanted files and folders is very important nowadays and it's really a tedious job too. In order to make this tedious job an easy one, i'm going to deliver you a the trick now.
For Example: You have a folder named "collegephotos" and this folder is stored in (Disk Drive E). You think that it should not be seen by strangers who use your PC.
For that you need to follow the following instructions
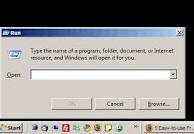
- Press windowkey+R: Run command dialog box appears.
- Now type "cmd" and hit enter. A command prompt window displays.
- Now type "attrib +s +h E:\collegephotos" and hit enter.
- The folder "collegephotos" will be hidden (Note: It cannot be viewed by any search options)
(To view this folder again, use the same command but replace '+' with '-' on both flags 's' and 'h')
08.Command Prompt on Right-Click
Many computer users, specially the programmers, need to launch a command prompt window every once in a while to execute some dos/shell commands. The problem is, when a command prompt window launched, the default path is normally the system path or the user profile's path. The users will then have to do all the "cd" commands to change the directories to the path he/she wants.
This trick shows you how to add an option called "Command Prompt" when you right-click on a folder in Windows. With this option, a Command Prompt Window will launch and its current directory will be the path to the folder you've selected.
Use this trick at your own risk.
Here's what you'll get:
 |
The Solution
You can either edit your registry OR download the registry file and apply it on your computer.
Method I. Manually edit the registry:
- Start > Run
- Enter "regedit" and hit Enter
- Expand to "HKEY_LOCAL_MACHINE\SOFTWARE\Classes\Folder\shell"
- Right-click on "shell" and select New > Key
- Make sure a new key is created under "shell". Change the name of this key to "Command Prompt"
- Right-click on this new key "Command Prompt" and select New > Key
- Change the name of this key to "command"
- Here's what we should have:
- Double-click on the "(Default)" text on the right window to bring up the edit box
- Enter this text into the Value Data field:
cmd.exe "%1" - Click OK and close the registry.
- Download this registry file Here
- Unzip it to a temp folder, then double-click on the .reg file to add the registry data.
With the CD-ROM available on almost every computer nowaday, floppy drives become a history. However, for those who find computers a hobby, might run into a situation when they need to create a bootable CD that works just like the old floppy disk. Unfortunately, to do this, you still need a floppy drive to read your bootup floppy disk. Wait, the good news is, you can just down load a bootable ISO image and burn it to a CD. And even better, we have a copy of an ISO image right here. You can download this image and follow the instructions below, or you can do a web search for more options.
The information on this article will guide you step-by-step how to create a bootable CD/DVD, either using a bootup floppy disk or a boot image file. You will end up having a bootable CD or DVD, with CD-ROM driver supported, that could startup your PC and bring up the command prompt. This is going to be a good starting point, then you can run other utilities such as hard drive ghost, etc..
Many current CD/DVD burning software support the bootable feature. If you already have your favorite burning software, look around to find the bootable option. For this article, I will use the steps and sample screen-shots with the burning tool called Nero.
You will need a boot disk (floppy) or a bootable ISO image to start. If you don't have one, you can download an ISO image here. This boot image is Windows-98 based, which means it uses the Windows 98 bootup sequence, which should do what we need. You can also download different boot disk images from the internet. I've found bootdisk.com has a very good collection.
I assume that you already have Nero installed. Also, it is highly recommended to use a rewritable disc so you can redo the process if you have to.
- Launch Nero Burning ROM
- At the New Compilation Window, select "CD" from the drop-down menu and select "CD-ROM (Boot)" for CD, (or select "DVD" and "DVD-ROM (Boot)" for DVD)


- If you use a bootup floppy disk, insert the floppy disk and select "Bootable logical drive..."

- If you use an image file, select "Image File" then click "Browse" to browse to the image.

At the "Open" Window, browse to the location where you saved the boot image and choose the image you wish to use and click "Open" (you might need to change the "Files of type" to "All Files" in order to see files with different extensions.)

- Click "New" at the New Compilation Window.
- Nero New Compilation Window disappears and Nero brings up its main
screen where you can add more files to the CD/DVD if you wish. For
example, adding a "ghost" folder with the file "ghost.exe" as follows.
Once you're done adding all the files you wish to, click on the "Burn" icon.

- At the "Burn Compilation" Window, select "Burn"!
Related Articles:
Create a boot image from a floppy boot disk
10. BASIC COMMAND
Friends ,here is some useful shortcuts run commands for you . SHIFT+DELETE ( Delete the selected item permanently without placing the item in the Recycle Bin )
CTRL+C ( Copy )
CTRL+X ( Cut )
CTRL+V ( Paste )
CTRL+Z ( Undo )
CTRL while dragging an item ( Copy the selected item )
CTRL+SHIFT while dragging an item ( Create a shortcut to the selected item )
F2 key ( Rename the selected item )
CTRL+RIGHT ARROW ( Move the insertion point to the beginning of the next
word )
CTRL+LEFT ARROW ( Move the insertion point to the beginning of the previous word )
CTRL+DOWN ARROW ( Move the insertion point to the beginning of the next paragraph )
CTRL+UP ARROW ( Move the insertion point to the beginning of the previous paragraph )
CTRL+SHIFT with any of the arrow keys ( Highlight a block of text )
ALT+Underlined letter in a menu name ( Display the corresponding menu )
Underlined letter in a command name on an open menu ( Perform the corresponding command )
F10 key ( Activate the menu bar in the active program )
RIGHT ARROW ( Open the next menu to the right , or open a submenu )
LEFT ARROW ( Open the next menu to the left , or close a submenu )
F5 key ( Update the active window )
BACKSPACE ( View the folder one level up in My Computer or Windows Explorer )
ESC ( Cancel the current task )
SHIFT when you insert a CD-ROM into the CD-ROM drive ( Prevent the CD-ROM from automatically playing )
CTRL+A ( Select all )
F3 key ( Search for a file or a folder )
ALT+ENTER ( View the properties for the selected item )
ALT+F4 ( Close the active item , or quit the active program )
ALT+ENTER ( Display the properties of the selected object )
ALT+SPACEBAR ( Open the shortcut menu for the active window )
CTRL+F4 ( Close the active document in programs that enable you to have
multiple documents open simultaneously )
ALT+TAB ( Switch between the open items )
ALT+ESC ( Cycle through items in the order that they had been opened )
F6 key ( Cycle through the screen elements in a window or on the desktop )
F4 key ( Display the Address bar list in My Computer or Windows Explorer )
SHIFT+F10 ( Display the shortcut menu for the selected item )
ALT+SPACEBAR ( Display the System menu for the active window )
CTRL+ESC ( Display the Start menu )
CTRL+TAB ( Move forward through the tabs )
CTRL+SHIFT+TAB ( Move backward through the tabs )
TAB ( Move forward through the options )
SHIFT+TAB ( Move backward through the options )
ALT+Underlined letter ( Perform the corresponding command or select the
corresponding option )
ENTER ( Perform the command for the active option or button )
SPACEBAR ( Select or clear the check box if the active option is a check box )
Arrow keys ( Select a button if the active option is a group of option buttons )
F1 key ( Display Help )
F4 key ( Display the items in the active list )
BACKSPACE ( Open a folder one level up if a folder is selected in the Save As
or Open dialog box )
Windows Logo+F ( Search for a file or a folder )
CTRL+Windows Logo+F ( Search for
A true computer genius knows all about commands of Command Prompt. You can guess its importance by the fact that though a better Graphical User Interface is being provided by the Microsoft in Windows but still Windows have Command Prompt in it. It enables you a lot of tricks by creating batch files, some hacking also. I am not going to tell you how you can use Command Prompt for hacking but I am here to tell you how to have a good command at Command Prompt. I will tell U way how U can get the complete information about a command in Cmd.
Command Prompt needs a lot of your memory so that you can easily remember many commands of the Command Prompt. It has a lot of Commands that need to be used and practiced by you. Now, first thing that you must know for having a good command over command prompt is of course is the list of commands that Command Prompt provides.
You can get it by typing only help in the command prompt.It will give the list of commands.
Secondly, you need to select a command that you want to know. For example, I want to know about net command. It is a great command whose utility I will tell you some other day. So, I want to know about net command, I will write “help net” in the command Window. Sometimes the help section of the particular command is quite large. Then, it becomes quite painful to see all the details of a particular command. For this, there is also a way, you need to write
help command-name |more
After all if you feel lazy to type then I have something for you.
You need to write “commad-name /?”
That’s all my friend.
And of course, do not forget about Internet, the Ultimate Knowledge Source, you will get more from here than the command Window.
Keep Learning…………………………